You have unboxed your first controller and you want sound coming out of the speakers as fast as possible. The good news is that a modern DJ controller is closer to plug-and-play than ever, but there is a specific order that turns it works into it works properly and safely. This guide walks you through that order — software first, then power, then outputs, then audio routing, then a careful first-sound test — and ends with the troubleshooting that fixes the overwhelming majority of beginner problems.
What Is in the Box and What You Need
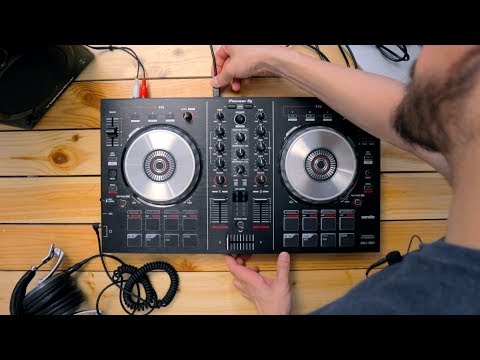
Open the box and you will usually find the controller itself, a USB cable (often USB-C on newer units), warranty and safety leaflets, and a card with a software licence or download code. Two-channel beginner controllers such as the Pioneer DJ DDJ-FLX4, DDJ-REV1 or the Numark Party Mix typically do not include speakers, headphones, or an external power supply — they draw power over the single USB cable.
To complete the setup you need four things beyond the controller.
• A computer or mobile device that meets the software's system requirements (a laptop running macOS or Windows, or in many cases an iPhone, iPad or Android phone or tablet).
• Headphones with a 3.5 mm or 1/4-inch plug — essential for cueing the next track before the audience hears it.
• Speakers — almost always active (powered) speakers or studio monitors for a home setup.
• The right cables to connect the controller's master output to those speakers.
A DJ controller is a control surface with a built-in sound card; it does not mix audio by itself but tells the software how to mix, and its internal audio interface usually provides four output channels (two stereo pairs) so the master can go to the speakers while the cue goes to your headphones. That detail — described in the encyclopedic overview of the DJ controller — is the whole reason the connection sequence below matters.
Install the Software and Any Driver
Install the DJ software before you plug in the controller. Most controllers are bundled with a specific platform: rekordbox (Pioneer DJ / AlphaTheta), Serato DJ Lite or Pro, Traktor (Native Instruments), VirtualDJ, or djay by Algoriddim. Download the version your controller unlocks from the maker's official site — rekordbox and Serato DJ Lite are both free downloads, and the controller unlocks the performance features when connected.
The driver question trips up beginners, and the answer depends entirely on your operating system.
• On macOS, virtually all DJ controllers are class compliant, meaning they work through Apple's built-in Core Audio with no separate driver to install. You connect and the controller appears as an audio device.
• On Windows, behaviour varies. Many beginner controllers (the DDJ-FLX4 and DDJ-REV1, for example) still work without a dedicated driver — the FLX4 appears as a WASAPI device — but larger and older units require you to download and install the manufacturer's ASIO driver first.
ASIO (Audio Stream Input/Output) is a protocol developed by Steinberg that lets audio software talk directly to the hardware, bypassing the Windows audio stack to achieve very low latency. macOS does not need it because Core Audio already provides low-latency performance. If your Windows controller has no native driver, the free third-party ASIO4ALL can act as a bridge, but a manufacturer's own ASIO driver is always the better choice. The rule of thumb: Mac users almost never install a driver; Windows users should check the support page for their exact model and install the ASIO driver if one is listed.
Connect the Controller to Your Computer
With software installed, connect the USB cable from the controller to your computer, then power the unit on (some have a rear power switch; bus-powered units simply light up). Here is the power distinction that surprises people.
| Controller type | How it gets power |
|---|---|
| Most 2-channel beginner units | USB bus power over the single data cable |
| Many 4-channel or larger units | Separate external power supply (PSU) |
Two-channel controllers like the DDJ-FLX4, DDJ-REV1 and Party Mix are bus-powered: the same cable carries both data and power. Pioneer DJ's own specifications confirm the DDJ-FLX4 runs on USB bus power of DC 5 V, 500 mA — exactly what a standard USB port supplies — while it can alternatively take DC 9 V, 3 A from a USB power adapter when used with a phone. The Numark Party Mix is likewise USB bus-powered, with a 3.5 mm TRS main output and a 3.5 mm TRS headphone output for the cue system. By contrast, larger four-channel and pro-style units — the Pioneer DJ DDJ-1000 and DDJ-FLX10, for instance — ship with a dedicated 12 V AC adapter and will not run fully on USB power alone, partly because their extra outputs (including balanced XLR) draw more current. If your controller came with a power brick, use it. Connect the controller directly to a USB port on the computer rather than through a hub, which can cause power and recognition problems.
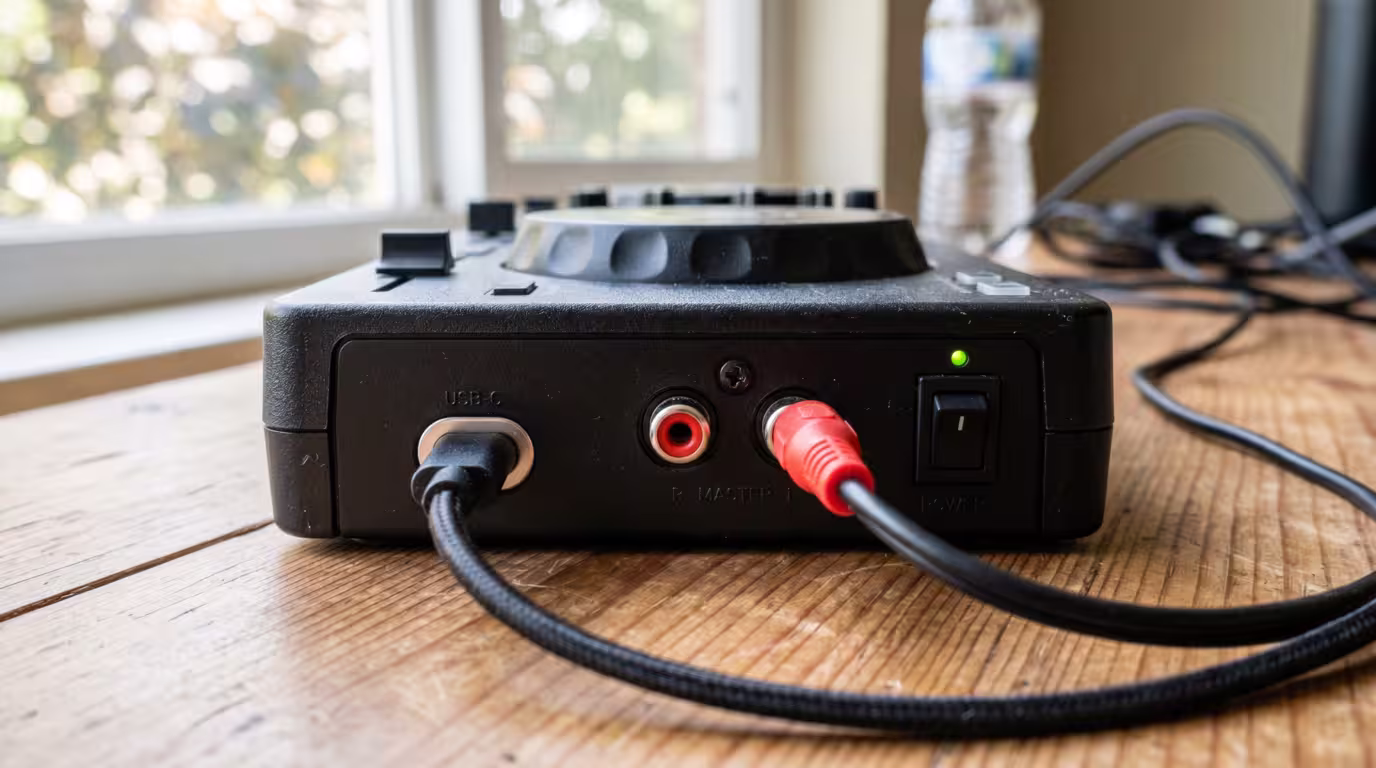
Connect Speakers to the Master Output
Find the connectors labelled MASTER on the back of the controller. These carry a line-level signal and come as either RCA (the red-and-white phono-style sockets common on beginner units) or 1/4-inch TRS jacks (on bigger units, sometimes alongside balanced XLR).
Connect those master outputs to the inputs of your active (powered) speakers — monitors with their own built-in amplifier. If you instead own passive speakers, they have no amplifier, so you must run the master output into a separate amplifier first, and the amplifier's speaker terminals out to the passive speakers.
| Master connector | Typical on | Connects to |
|---|---|---|
| RCA (phono-style) | Beginner 2-channel controllers | Active speaker or amp line input |
| 1/4-inch TRS | Larger controllers | Active speaker or amp line input |
| XLR (balanced) | Pro controllers | PA system, powered PA speakers |
Never Plug Into a Phono Input
This is the single most damaging mistake beginners make. On an amplifier or some speakers you may see an input labelled PHONO. Do not plug your controller's master output into it. A phono input is built specifically for a turntable's cartridge — a moving-magnet cartridge outputs only about 3 to 5 millivolts, and a low-output moving-coil one as little as 0.2 to 0.5 millivolts — and the input applies RIAA equalization, a curve that boosts bass and cuts treble, along with a large amount of amplification to bring that weak signal up. Your controller's master output is a far stronger line-level signal. Feeding it into a phono input overwhelms that input, producing extremely loud, bass-heavy distortion and potentially damaging it. Always use inputs labelled LINE, AUX, CD or similar. Understanding line level — the standard at which your controller outputs — makes this clear: consumer line level is about 0.316 V, while a phono cartridge produces only thousandths of a volt.
Connect Headphones and Understand Cueing
Plug your headphones into the headphone output (often on the front edge of the controller, a 3.5 mm or 1/4-inch jack). This output is not just a duplicate of the speakers — it is your cue or pre-listen (PFL) channel.
The built-in audio interface inside the controller is what makes this possible. It sends two different signals out of two different sockets at the same time: the master mix to the speakers, and whatever you have cued to the headphones. This is why the controller has a sound card with four output channels rather than two. The cue system lets you find, beatmatch and prepare the next track in your headphones while the audience keeps hearing the current track on the speakers. A cue level knob and a cue/master mix knob on the controller let you control what you hear and how loud.
Configure the Audio Device in the Software
This is the step where most no-sound complaints originate. Open your software's audio preferences and make sure the controller's sound card — not your laptop's built-in audio — is selected as the output device.
• rekordbox: Preferences, then Audio. On Windows you select the PIONEER ASIO device for your model (or the WASAPI device for FLX-series units); on Mac you select the controller by name.
• Serato DJ Lite or Pro: Setup, then Audio.
• Traktor: Preferences, then Audio Setup and Output Routing — for Native Instruments controllers this is usually configured automatically.
• VirtualDJ: Settings, then Audio Setup, where the Master + Headphones option routes master to the speakers and the cue to the headphone channel; the official VirtualDJ audio setup manual documents these options in detail.
• djay by Algoriddim: it automatically detects most class-compliant controllers and configures them instantly across Mac, Windows, iOS and Android, routing audio for you, and you can confirm or change the device under Settings, then Audio. (Headphone pre-cueing through the controller's sound card requires djay's PRO subscription.)
A common Windows-specific trap: if Windows grabs the controller as the system's default playback device, the DJ software cannot take exclusive control of it and reports a connection error. The fix is to set your computer's built-in speakers as the Windows default playback device, leaving the controller free for the DJ software. If you genuinely have no speakers yet, every major app offers a use-laptop-speakers option so you can still practise with the controller's cue working through your headphones.
First-Sound Test and Safe Gain Staging
Before you touch the volume, set everything to neutral: channel faders down, gains at 12 o'clock, the master at a moderate level, and your speakers turned down. Load a track, push one channel fader up, and bring the master and speaker volume up gradually until you hear music. If sound comes from the laptop instead of the speakers, the audio device is set wrong (see the previous section).
Now stage your gains. The goal is a strong, clean signal without clipping. On each channel, with the fader up, set the gain (trim) so the loudest peaks of the track land just below the red on the channel meter. Serato's own gain structure article makes the point plainly: when the meters sit just below the red, your signal is as loud as it can be without clipping. A practical target is peaks around -6 to -3 dB. Then bring the master up so it, too, sits below the red — never redlining. The space between your average level and the red is headroom, and keeping it lets your mix breathe and stay distortion-free. From there, control overall loudness with the master and your speaker volume, not by cranking every gain.

Firmware Updates and MIDI Basics
Once you have sound, check for a firmware update. As AlphaTheta (Pioneer DJ) explains, firmware is the program that lives inside the unit, and updating it adds new features, support for more DJ applications and bug fixes — which is why makers recommend always running the latest version. Download the updater for your exact model from the maker's support site, connect over USB, close other apps, and do not disconnect power or USB mid-update. Many makers now offer a background tool that notifies you when an update is available.
You will also hear about MIDI mapping. Controllers communicate with software using the MIDI or HID protocols over USB, and the bundled software already includes an official map so every knob, fader and pad does the expected thing out of the box. As a beginner you do not need to remap anything — but the option exists later to reassign controls to custom functions through your software's controller or MIDI preferences.
Troubleshooting Common Problems
Most first-day issues fall into a short list. Work through symptom to cause to fix.
| Symptom | Likely cause | Fix |
|---|---|---|
| No sound at all | Wrong audio device selected | Select the controller's sound card in audio preferences |
| Sound from laptop, not speakers | Output set to built-in audio | Re-route master to the controller and check the master cable |
| Controller not recognised (Windows) | Windows grabbed it as default device | Set built-in speakers as Windows default; try another USB port or cable |
| Controller not recognised (Mac) | USB, security or port issue | Try a different USB port; reconnect; confirm it appears as an audio device |
| Clicks, dropouts, distortion | Buffer size too low | Increase the audio buffer size in preferences |
| Loud bass-heavy distortion | Plugged into a phono input | Move to a LINE or AUX input |
| Hum or buzz | Ground loop between devices | Plug all gear into one outlet; test the laptop on battery |
| Cue not working or reversed | Headphone routing swapped | Check master and headphone channel assignment in audio setup |
A few of these deserve a note. Latency and buffer size are a trade-off: a smaller buffer gives tighter, more responsive control but strains the computer and can cause clicks and dropouts, while a larger buffer is more stable but adds delay — a balance that Sound on Sound's guidance on buffer size describes well. Serato recommends starting at a 5 ms USB buffer and then adjusting to taste, so begin there and only lower it if your computer can cope. Ground hum is usually a ground loop created by gear on different power circuits; Native Instruments' advice on resolving ground loops recommends connecting all devices to the same outlet and disconnecting peripherals one by one to find the culprit — running a laptop on battery momentarily is a quick test. If the controller is not recognised, a different USB cable or port solves a surprising number of cases.
Key takeaways
• Install the software first; on Mac you need no driver, on Windows install the manufacturer's ASIO driver if your model requires one.
• Most 2-channel controllers run on USB bus power (the DDJ-FLX4 draws just 5 V, 500 mA); larger 4-channel units need their external power supply.
• Send the MASTER output to active speakers or an amp — never into a phono input, which expects a far weaker, RIAA-equalized signal and will distort loudly.
• In the software, select the controller's sound card as the output device; choosing laptop audio is the usual cause of no sound from the speakers.
• Set channel gains so peaks sit just below the red, keep the master out of the red, and update firmware before your first real mix.
Ready-made, exclusive EDM tracks with full rights — released as your own.
