Recording your DJ mix is the single most useful habit you can build as a DJ, and it is far easier than most beginners expect. Whether you play on a controller, a pair of CDJs and a mixer, or an all-in-one standalone system, there is a reliable way to capture your set as an audio file. This guide walks through every method, how to set clean levels, which formats to choose, and what to do with the recording once you have it.
Why You Should Record Every Set
There is only one person who never hears your DJing the way the room hears it: you. While you are cueing, beatmatching and watching the floor, you simply cannot judge your own blends objectively. A recording fixes that. Played back a day later, it reveals the things you missed in the moment — a transition that dragged, a track brought in too quietly, kick drums stacking up and muddying the low end, or levels drifting all over the place.
Beyond self-critique, recordings have practical value. They become a portfolio you can send to promoters and venues, demo material for labels and radio shows, and content you can share with fans on platforms like Mixcloud or SoundCloud. Many working DJs also keep an archive of their gigs simply as a record of their progress. Whatever your goal, the workflow is the same: capture a clean file, listen back honestly, and improve.
This article focuses on the process and methods of recording. For the gear itself — mixers, controllers, audio interfaces and laptops — see the Gear and Software articles in this knowledge base. For the deeper fundamentals of setting levels through your whole signal chain, see the gain-staging section of EQ Mixing and Bass Swaps.
The Four Main Ways to Record
Almost every recording setup falls into one of four approaches. The right one depends entirely on the gear you already use.
| Method | What you need | Best for |
|---|---|---|
| Software recorder | Laptop + DJ software | Controller/laptop DJs |
| USB on standalone gear | Standalone unit or club mixer | CDJ/no-laptop setups |
| Audio interface into a DAW | Mixer + interface + computer | Hardware mixer rigs |
| Phone/handheld recorder | Recorder + line cable | Quick captures, backup |
1. Your DJ Software's Built-In Recorder
If you DJ from a laptop, this is the easiest method by far — usually a single click. Every major DJ application has a record function that captures the master output to a file on your computer.
In rekordbox, you record the Master Out from within PERFORMANCE mode using the record panel, and files save by default as uncompressed WAV (44.1 kHz / 16-bit) to your Music/PioneerDJ/Recording folder, with a new file created automatically after three hours. In Serato DJ, the REC button opens the recording panel; setting the input to MIX records post-faders and post-EQ but pre-master-gain, and recordings are saved as 24-bit by default. Traktor's Audio Recorder lives behind the small cassette icon in the global section, with a gain knob to control the recording level and files landing in Music/Traktor/Recordings. VirtualDJ records the master output and can save to MP3, OGG, FLAC or WAV, while djay by Algoriddim uses a simple red record button at the top of the window.
Two caveats are worth knowing. First, some software gates recording behind a connected piece of hardware or a paid plan — on the desktop, rekordbox needs a Hardware Unlock device connected or a subscription to enable recording, and its mobile recorder is limited to 30 minutes per week without an in-app subscription. Second, recording is automatically disabled when you play tracks from streaming services such as TIDAL or Beatport Streaming, because of licensing restrictions; you generally need to own the music files to record them.
2. USB or SD Recording on Standalone Gear and Club Mixers
Many standalone systems and professional club mixers can record the master mix straight to a USB stick or SD card with no computer at all — ideal for CDJ-style and club setups. On the Pioneer DJ XDJ-RX3 you connect a drive to USB Port 2 and hold the MASTER REC button to start and stop recording, saving WAV files. The Pioneer DJ OPUS-QUAD records the master output to a connected USB drive or HDD as a WAV (44.1 kHz / 16-bit) file via the REC control on its shortcut screen. Denon DJ's Prime 4 records your set to a USB drive, SD card or an internal SATA drive, automatically creating a Sessions folder on the media the first time you save.
On club mixers, the Pioneer DJ DJM-REC iOS app plugs an iPhone or iPad into the mixer's USB send/return port and captures the mix digitally, even controlling the mixer's peak limiter to minimise clipping. The trade-off with standalone recording is that you usually need to transfer the file to a computer afterward to edit and upload it.
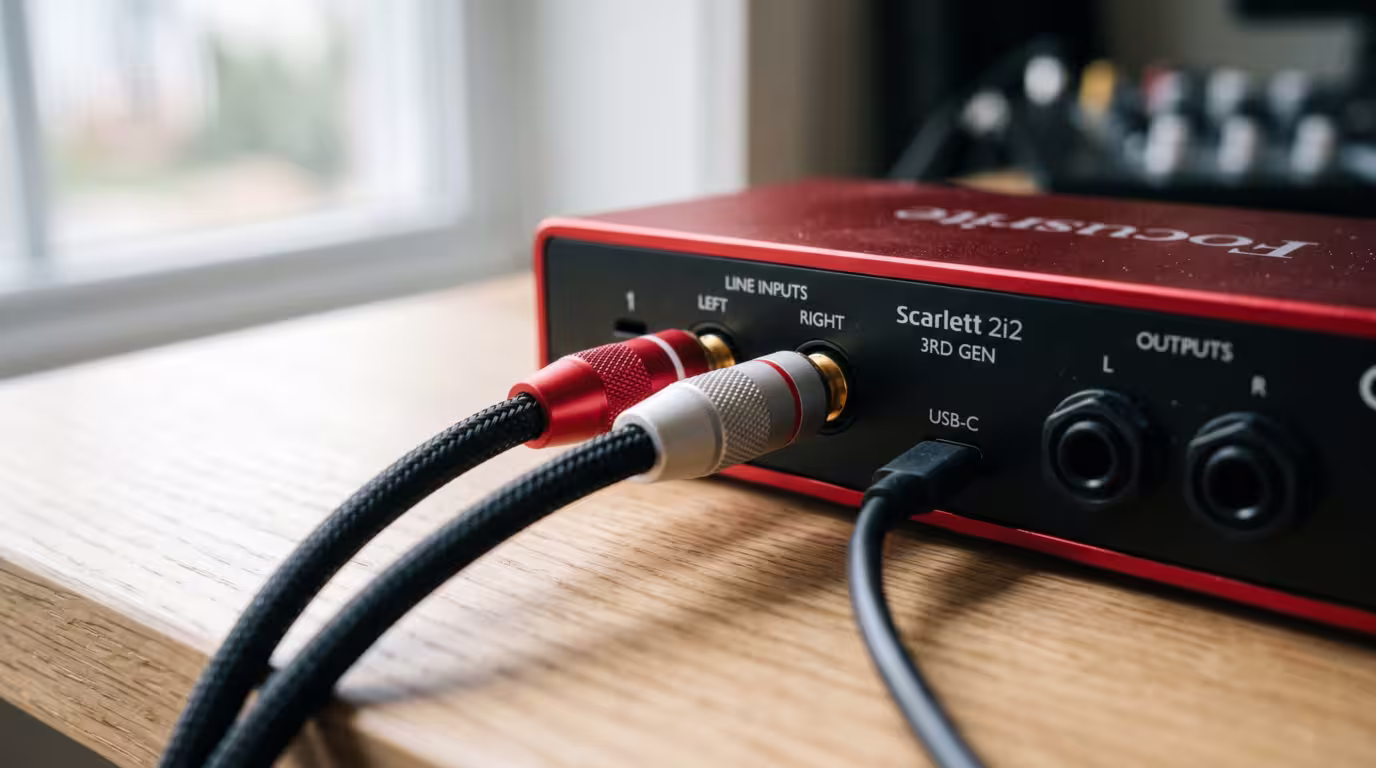
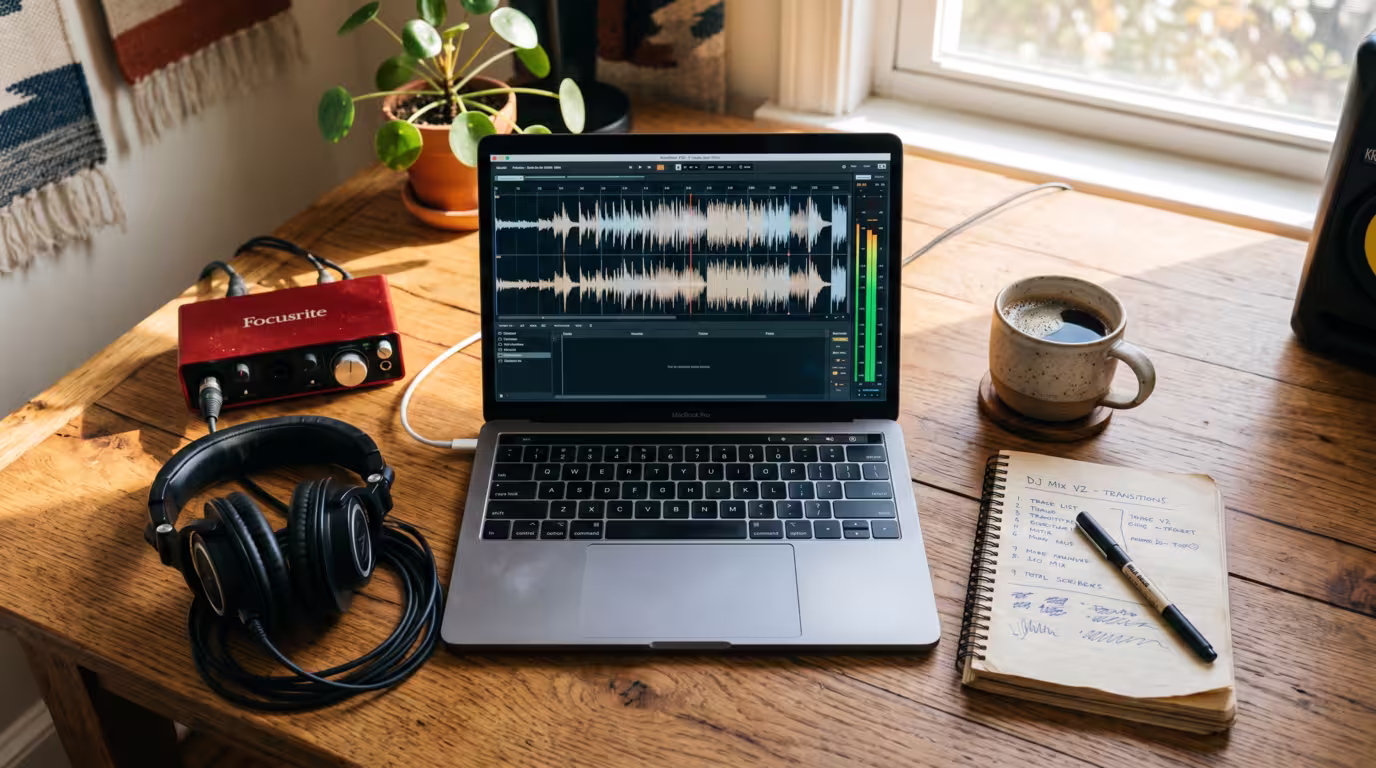
3. An Audio Interface into a DAW or Audacity
For a hardware setup — CDJs (or turntables) plus a standalone mixer — the most flexible, highest-quality route is to take an output from the mixer into an audio interface, and record into software on a computer. The free, open-source editor Audacity works perfectly for this, as do DAWs like Ableton Live, Logic Pro or Reaper.
The principle is simple: connect the mixer's REC OUT (or booth/second master) to the line inputs of your interface, set the software's input to that interface, choose 44.1 or 48 kHz at 16- or 24-bit, and arm the track. Crucially, make sure the input is set to line level — feeding a hot line-level signal into a mic input is a classic way to wreck a recording with distortion.
4. A Phone or Handheld Recorder
In a pinch, you can run a line cable from the mixer's REC OUT or booth output into a handheld recorder (such as a Tascam or Zoom device) or a phone. Always take a line-level feed rather than relying on a built-in microphone — computer and phone mic inputs are often mono, noisy and easily overloaded, so this is best treated as a backup or last resort rather than a method for a polished demo.
Always Record from the Right Output
Whichever method you use, record from a dedicated recording or master output at line level — never from a microphone in the room. Bigger and more professional mixers include a dedicated pair of line-level RCA outputs called REC OUT specifically for this. The key advantage of REC OUT is that it is a fixed line-level output that captures your channel mix without being affected by the master volume knob: if you ride the master up and down as the crowd changes, the recording stays at a consistent level. If your mixer has no REC OUT, a spare master or booth output will do the job.
Getting Clean Levels and Avoiding Clipping
This is the part beginners get wrong most often, and it is the one mistake you cannot fix later. A recording captures exactly what you send it. If your levels are too hot, you get digital clipping; if they are too quiet, you get a thin, low recording.
Digital audio has a hard ceiling of 0 dBFS (decibels relative to full scale). When the signal tries to exceed it, the peaks of the waveform are simply chopped off flat, producing harsh, crunchy distortion. Unlike gentle analog saturation, digital clipping is destructive and effectively irreversible — once the information above the ceiling is gone, no amount of editing fully restores it. Repair tools can only estimate what was there.
The fix is headroom: leave a margin below the ceiling. In audio engineering, headroom is the gap between your working level and the maximum level before distortion. A widely used target when recording a mix is to keep peaks a few decibels below zero — commonly cited figures range from about −6 to −3 dBFS, with some engineers preferring an even more conservative −6 to −12 dBFS. The exact number matters less than the principle: keep the meters out of the red. Watch the level indicator in your software's record panel (or on your interface/recorder) and do a quick test before committing to a full take.
Here is the golden rule of recording levels: it is always better to record a little too quiet than too hot. A quiet but clean recording can be brought up afterward with normalization; a clipped one is ruined. Some gear even helps here — Engine DJ's software added a Normalize function for evening out the level of Prime recordings (which are captured deliberately low, pre-master), and the DJM-REC app controls the mixer's limiter to head off clipping automatically.
| Level reading | What it means | Action |
|---|---|---|
| Peaks around −6 dBFS | Healthy, safe headroom | Record |
| Touching 0 dBFS / red | Clipping risk | Turn down |
| Peaks below −18 dBFS | Too quiet | Raise gain or normalize later |
File Formats and Quality
Once you can capture clean audio, choose the right format for the job. The decision comes down to lossless versus lossy.
WAV and AIFF are uncompressed, lossless formats that preserve the audio exactly. They produce large files — roughly 10 MB per minute, so a one-hour mix is around 600 to 700 MB — but they are ideal for archiving and editing. MP3 is a compressed, lossy format that discards some data to shrink the file dramatically; at 320 kbps the quality loss is inaudible to most listeners and the file is a fraction of the size, which makes it perfect for sharing and uploading. FLAC is a useful middle ground: lossless but compressed to a smaller size.
Sample rate and bit depth set the baseline quality. The standard is 44.1 kHz / 16-bit, known as CD quality; recording or working at 24-bit gives extra headroom and detail during editing. A sensible workflow is to record in a lossless format (WAV at 44.1 kHz, 16- or 24-bit), do any editing on that pristine file, then export a 320 kbps MP3 for uploading.
| Format | Type | Best for |
|---|---|---|
| WAV / AIFF | Uncompressed lossless | Archiving, editing |
| FLAC | Compressed lossless | Smaller lossless storage |
| MP3 320 kbps | Compressed lossy | Sharing, uploading |
After Recording: Listen, Edit, Share
Capturing the file is only half the job. The most valuable step is the simplest: listen back critically, ideally on speakers rather than headphones, which expose level inconsistencies and frequency build-up that headphones can mask. Listen for whether the beats actually lined up, whether track volumes stayed even, and whether any section sounds distorted.
For tidying up, a free editor like Audacity is more than enough. Trim the dead air from the start and end, apply a short fade, and use Normalize to bring a quiet recording up to a sensible peak (Audacity won't normalize above 0 dB, so it can't introduce clipping). Add basic metadata — artist, title, date — then export your MP3. Naming files clearly with a date saves you from a folder full of anonymous timestamps later.
A Brief, Factual Note on Copyright
DJ mixes contain other people's copyrighted recordings, and that affects where you can post them. This is not legal advice, but it is worth understanding. Mixcloud is built and licensed specifically for DJ mixes and radio shows: it is licensed and partners with major labels and many independents, along with publishers and performance-rights organisations, and it identifies and pays royalties on the tracks in your upload — so creators can share mixes legally without takedown worries. SoundCloud and YouTube, by contrast, run automated content-identification systems that scan uploads and can block or remove a mix containing tracks you do not have permission to use. Policies shift over time, but the practical takeaway is consistent: a platform designed and licensed for mixes is the safest home for a set full of commercial tracks.
Tips and Common Mistakes
• Do a test recording first. A 60-second test confirms your routing, source and levels before you commit to a full set.
• Record from the right output. Use REC OUT or master at line level, never a room mic or a mic input.
• Never record too hot. Clipping is unfixable; aim for peaks around −6 dBFS and stay out of the red.
• Don't record too quiet either. You can normalize a quiet file later, but excessive noise is hard to remove.
• Check disk space and media speed. Lossless audio eats storage, and standalone units need a reasonably fast USB/SD card.
• Confirm recording is actually running. Watch for the blinking indicator or running timer — many lost mixes were never recording at all.
• Name and date your files. Future-you will thank present-you.
• Listen back to improve. This is the entire point; treat every recording as feedback.
• Mind copyright when sharing. Post copyrighted mixes where they are licensed.
Key takeaways
• Recording your sets is the fastest way to improve, and every modern DJ setup has a way to do it.
• Pick the method that matches your gear: software recorder, USB/standalone, audio interface into a DAW, or a handheld recorder.
• Always capture from a line-level REC OUT or master output, never a microphone.
• Leave headroom — target peaks around −6 dBFS and never let the signal clip, because digital clipping can't be undone.
• Record lossless (WAV) for editing, then export a 320 kbps MP3 to share.
• Listen back honestly, and post mixes on a platform licensed for them, like Mixcloud.
Ready-made, exclusive EDM tracks with full rights — released as your own.
